OS Installation
Materials
Raspberry Pi 5
USB drive (see BOM)
Prepare USB drive
From your desktop / laptop:
- Download and install Raspberry Pi Imager (Do not use Balena Etcher).
Select
Raspberry.Pi.Imager.1.8.5.dmgfor Mac orimager-1.8.5.exefor Windows etc.
Download the “full” PiOS image (
pupOS_pios_full_[version]) from Google Drive herePlug in USB drive to your computer
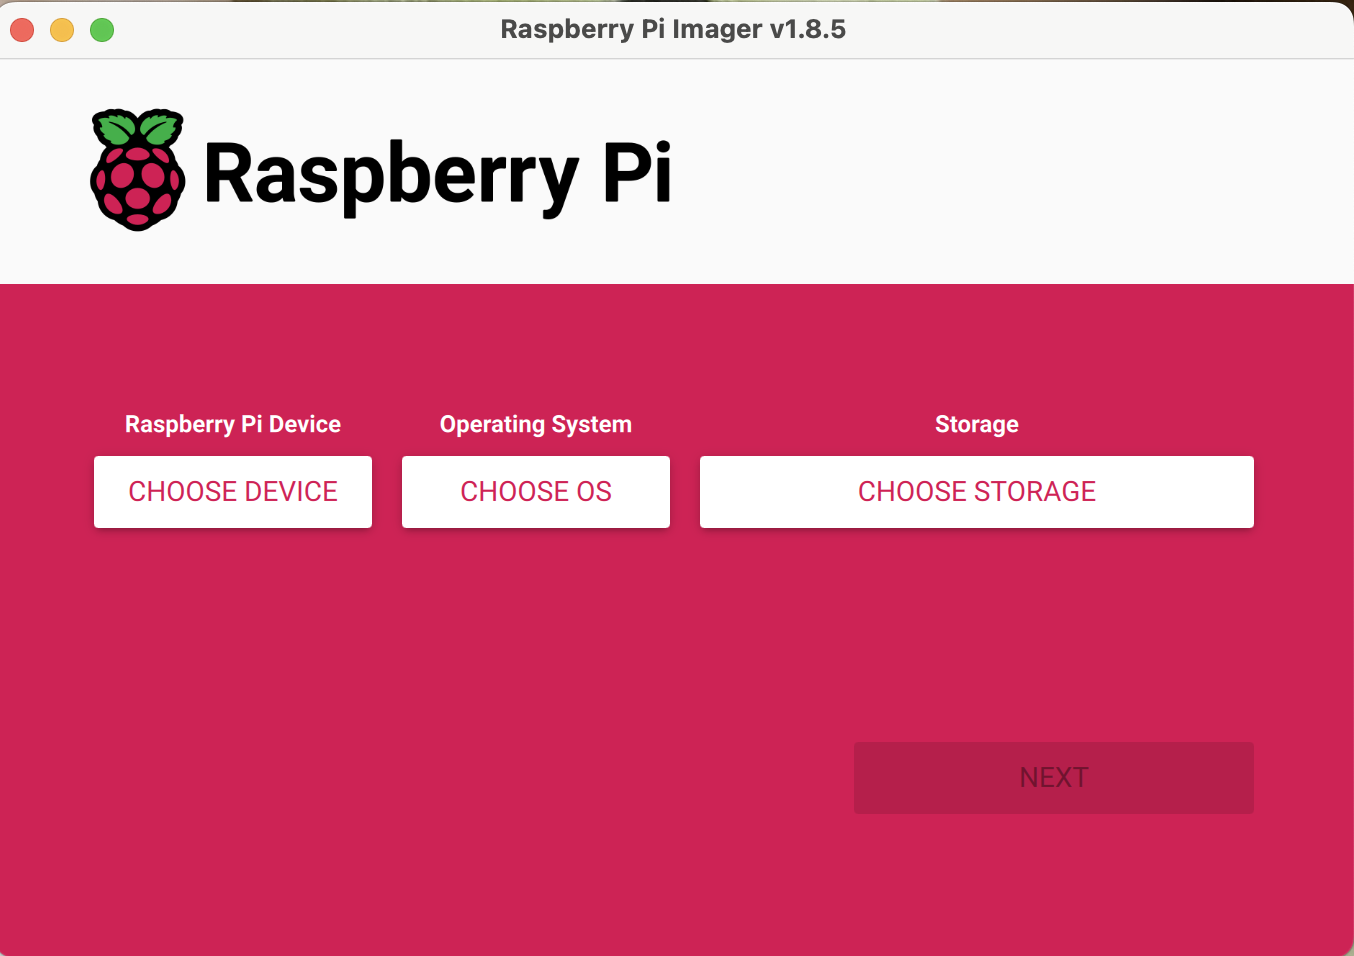
Open Pi Imager and you should see menu like below (skip updates if prompted, latest version 1.9.6 is broken):
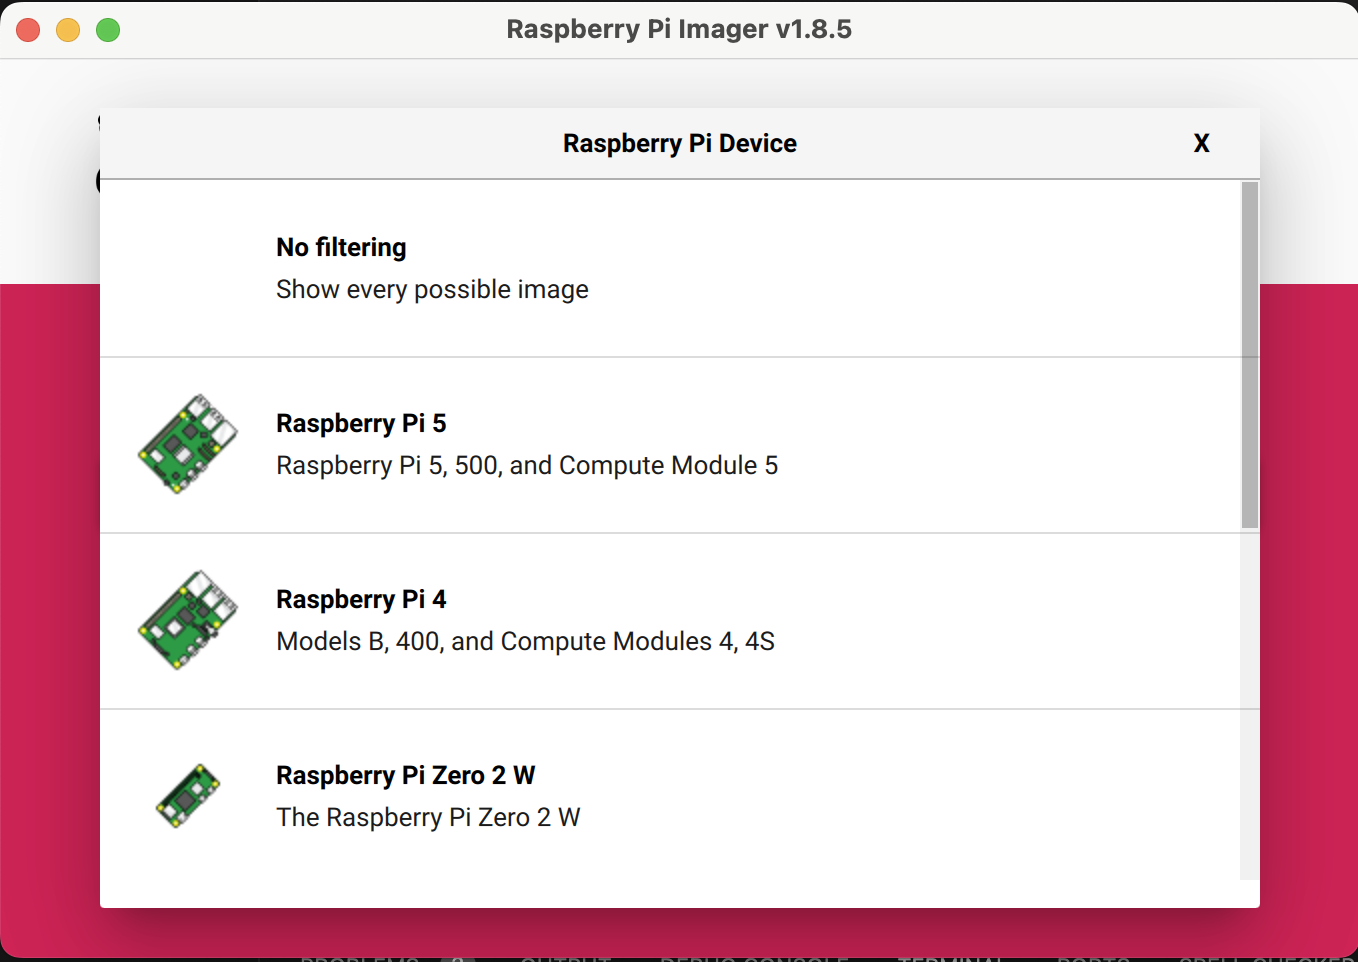
Click “Choose Device” and select Raspberry Pi 5 as shown below:
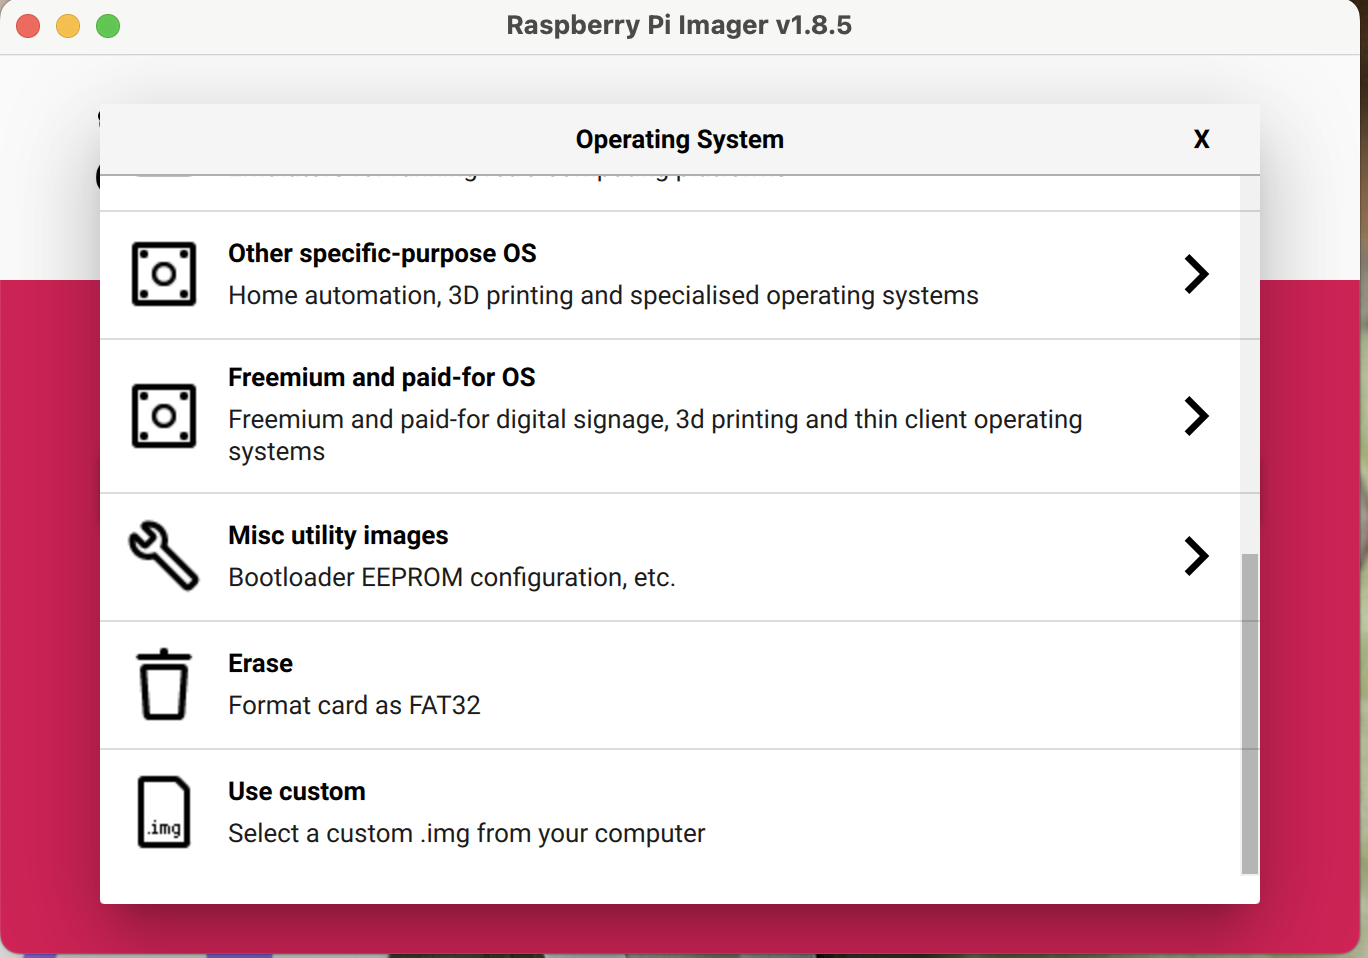
Click “Choose OS”, scroll down and select “Use custom” and then select our custom PiOS image you downloaded earlier:
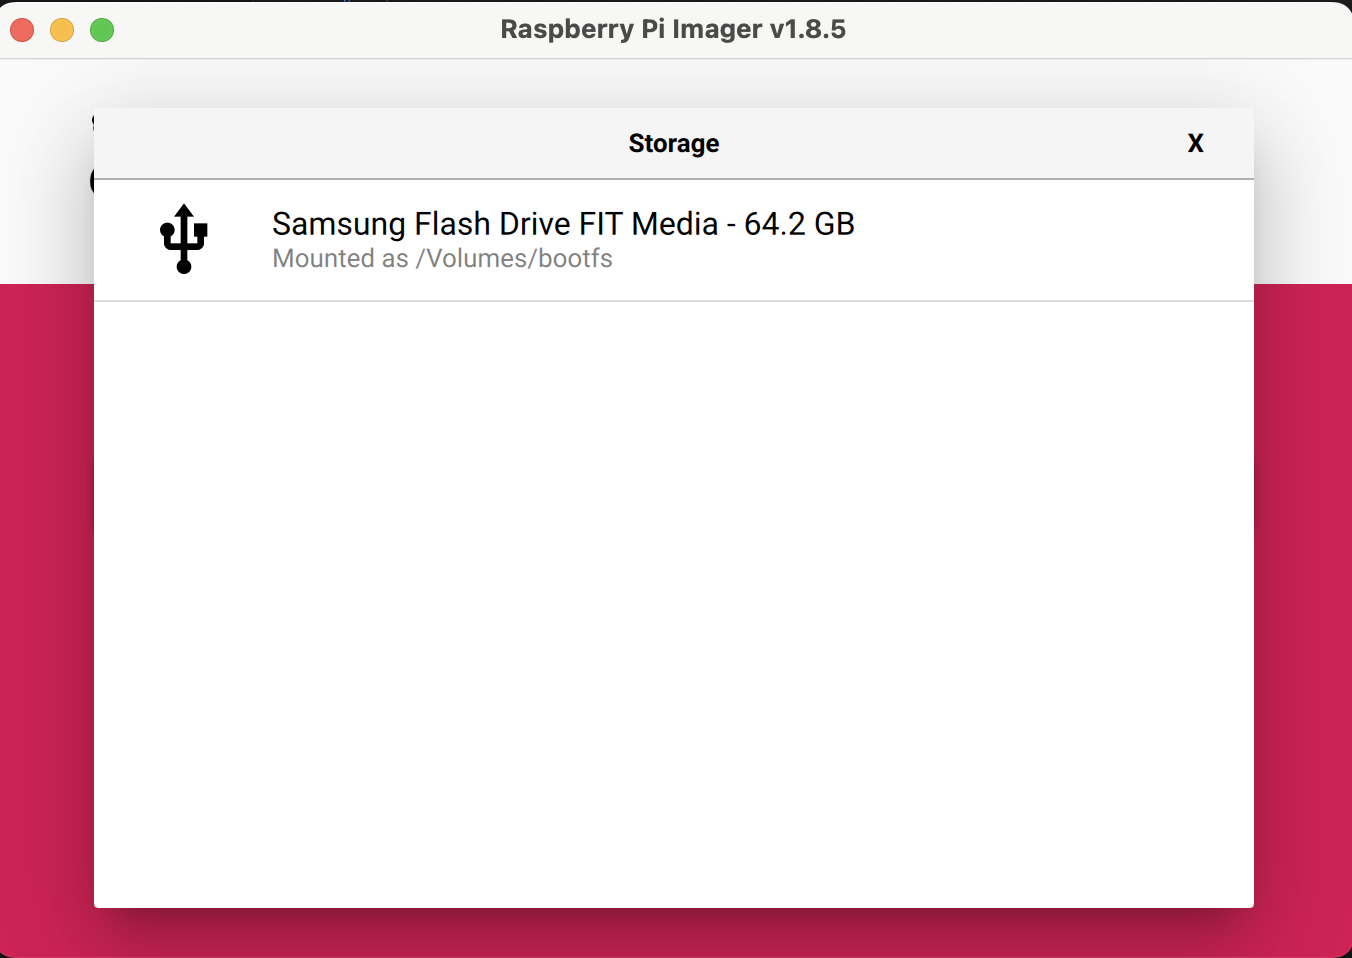
Click “Choose Storage” and select the USB drive you plugged in as shown below:
Click “Next” and then click “Edit Settings”
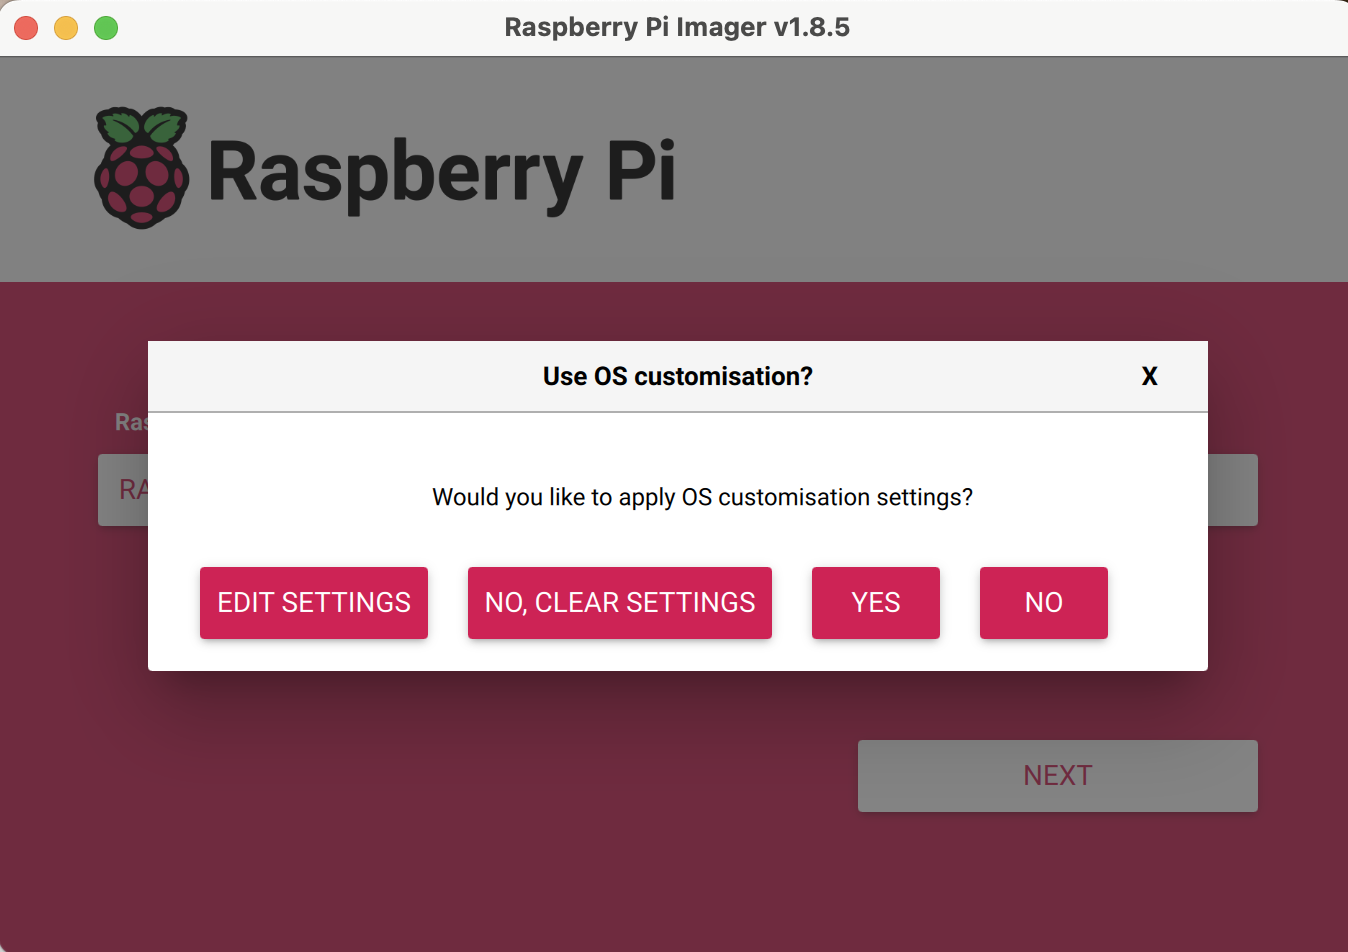
- Set OS customizations
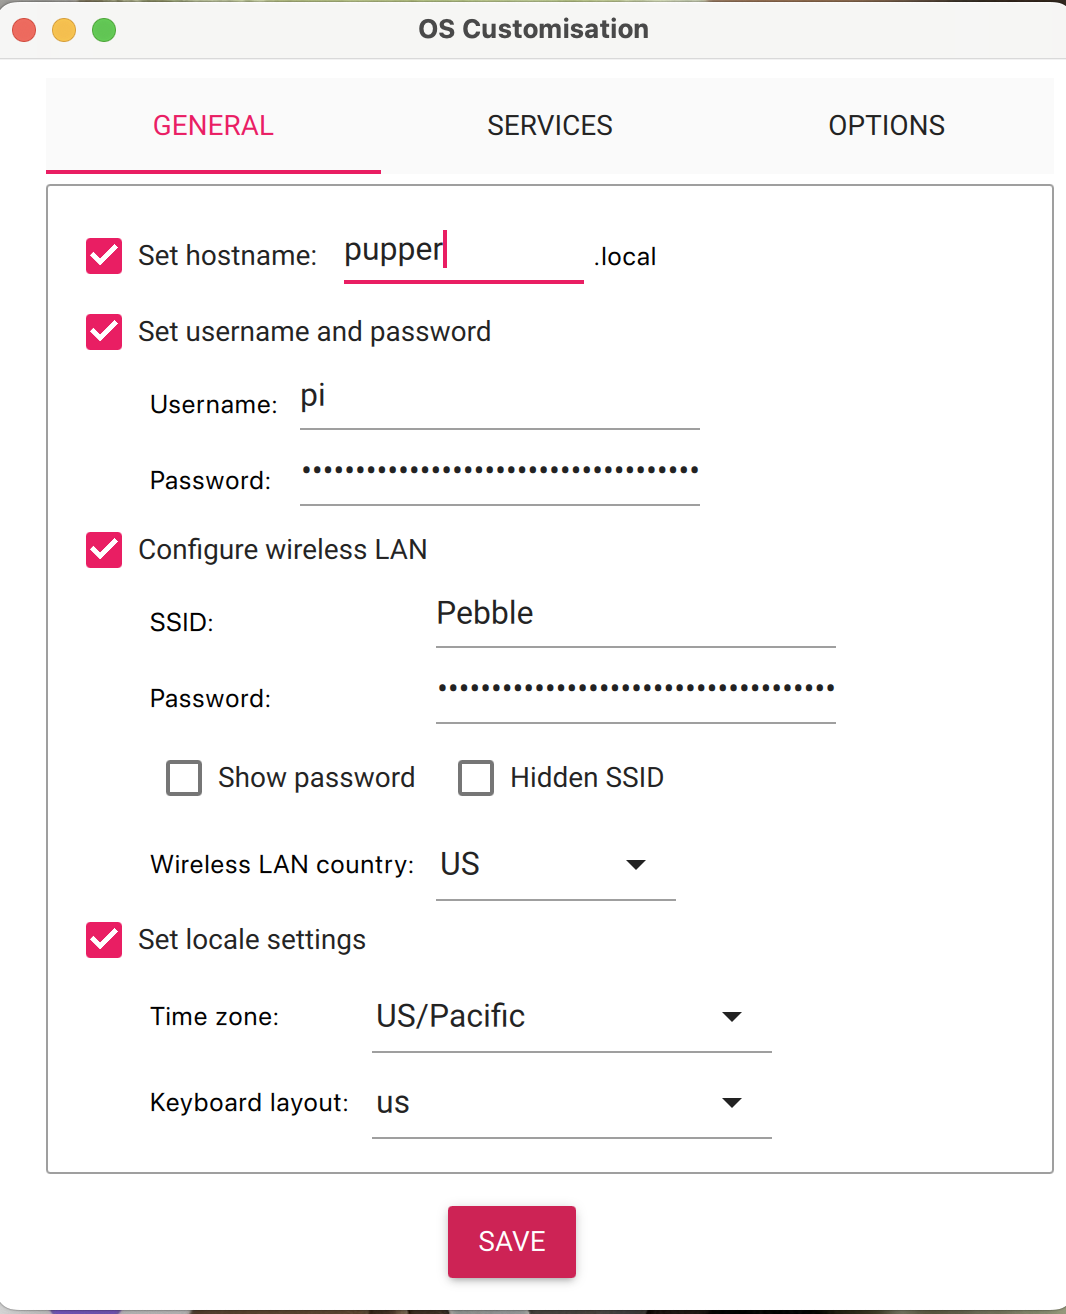
Set the hostname to
pupper& username topias shown.Set your password (our default is
rhea123).Replace “Pebble” with your own WiFi name and enter its password. If you want to use a WiFi network with a login screen (like Stanford networks), deselect “Configure Wireless LAN” and configure the WiFi after completing the rest of this setup guide and booting up the Raspberry Pi 5 with the USB drive.
Change the locale settings as desired.
Go to the “Services” tab and check the “Enable SSH” box. Enable password authentication instead of public key authentication.
Click “Save”.
Click “Yes” on OS customizations screen
Click “Yes” again when it asks to confirm to flash
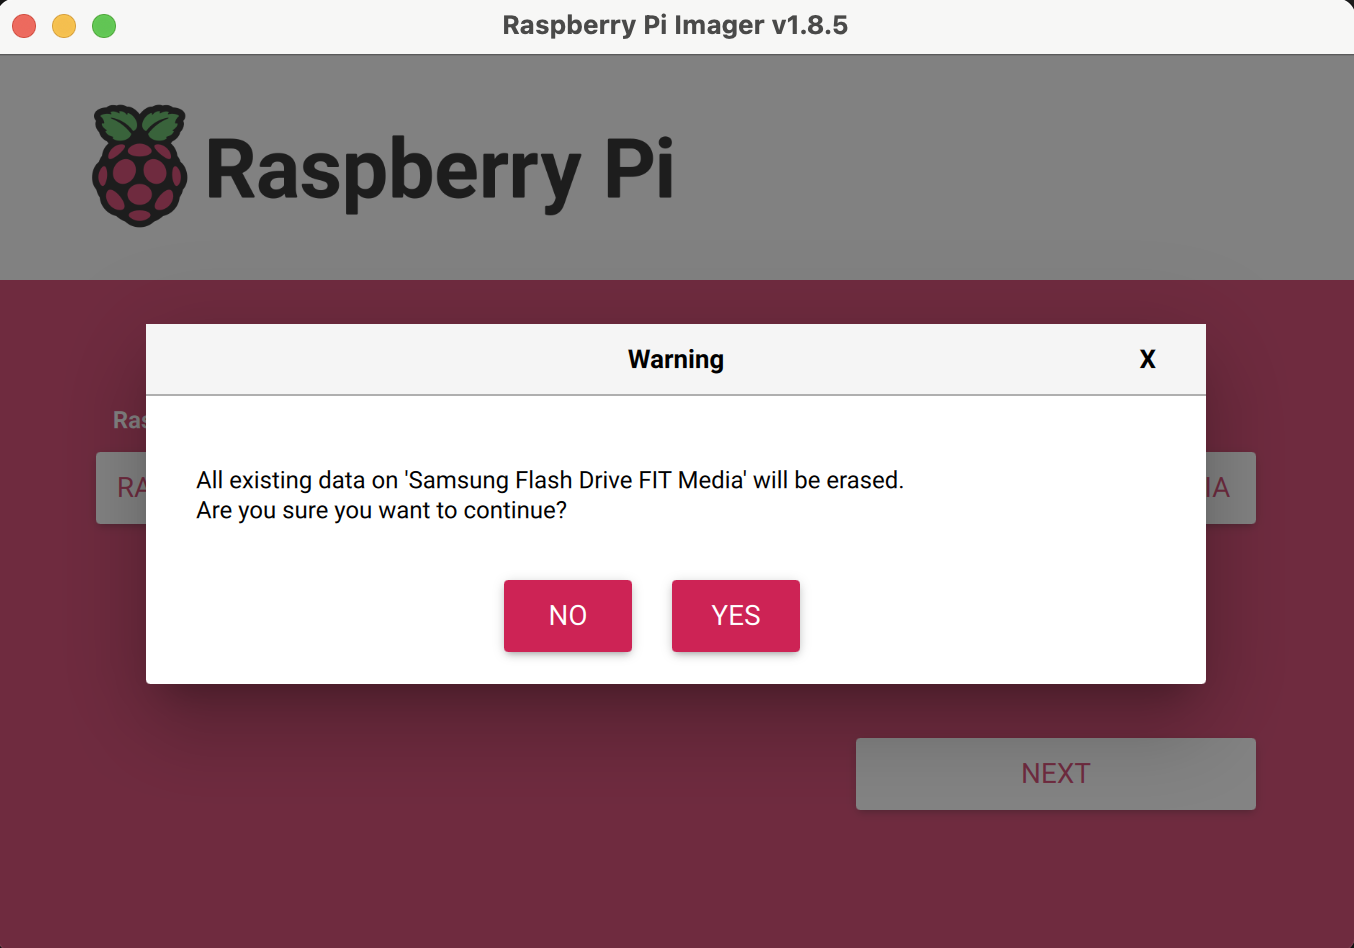
Once done flashing, insert the USB drive into one of the blue USB 3 ports on the Raspberry Pi 5 and you’re done!
First-time setup
Turn on Pupper
- Pair PS5 controller
- Option 1: Use mouse to pair PS5 controller to Raspberry Pi (see BOM for recommended wireless integrated keyboard & trackpad)
Plug mouse into the Raspberry Pi 5
Click the Bluetooth icon on the top-right menu bar of the PiOS desktop and click “Add device”
Put the controller into pairing mode by pressing and holding the \|/ looking button on the top left of the gamepad and the playstation logo button at the same time until you get flashing lights as shown. If the controller turns on not in pairing mode, turn it off by pressing the playstation logo for 10s.
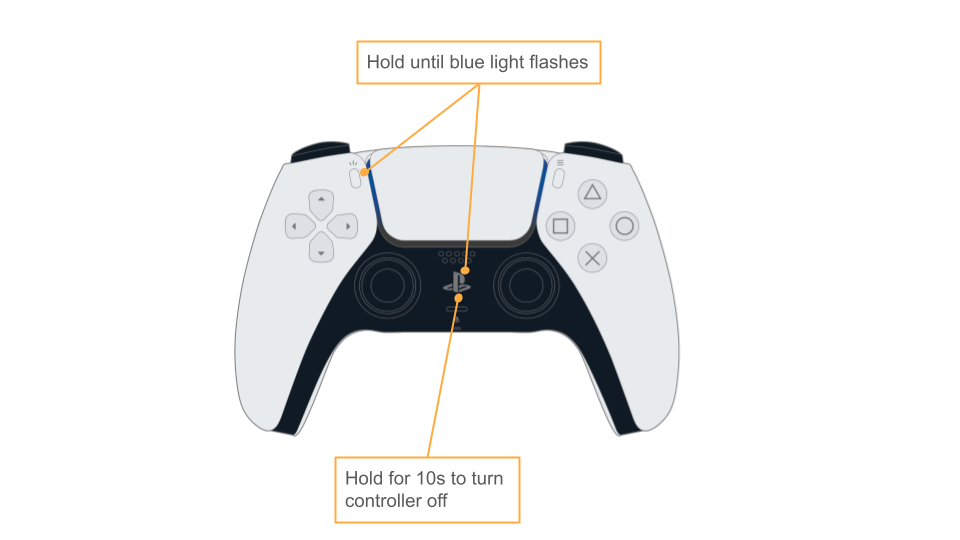
Select the gamepad from the list of devices and click “Pair”
After a few seconds the controller should display solid blue lights and a white light above the PS logo as shown below:
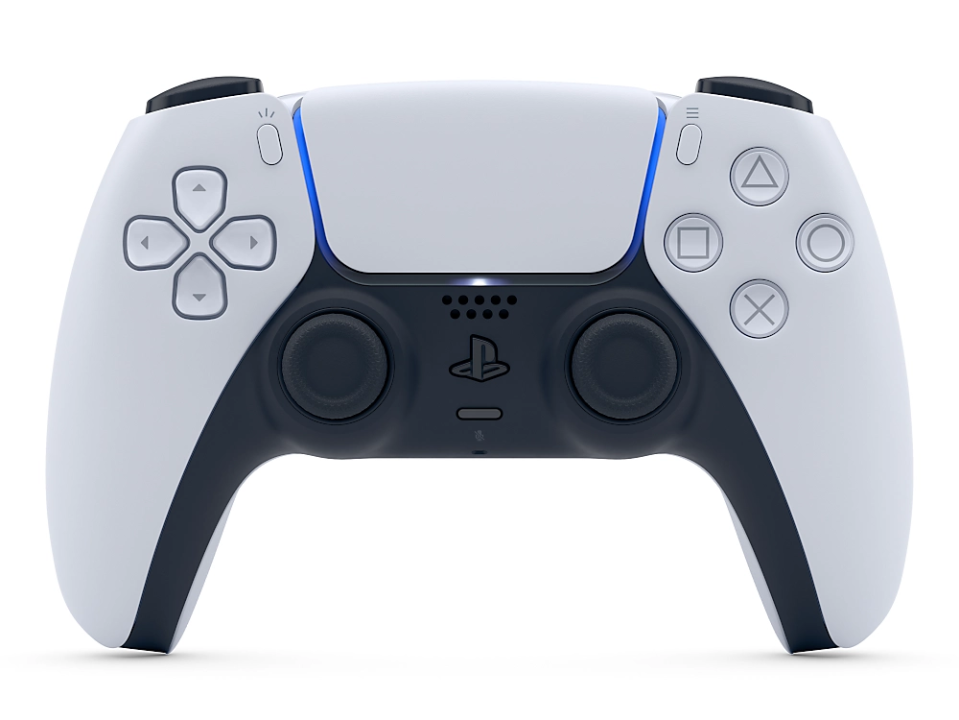
- Option 2: Use PS5 controller connected over USB-C to USB-A cable to pair to Raspberry Pi (more difficult option)
Connect the controller to the Raspberry Pi 5 using a USB-C to USB-A cable
Click the Bluetooth icon on the top-right menu bar of the PiOS desktop and click “Add device”
Unplug controller from the Raspberry Pi 5
Put the controller into pairing mode by pressing and holding the \|/ looking button on the top left of the gamepad and the playstation logo button at the same time until you get flashing lights
Plug the controller back into the Raspberry Pi 5 using the USB-C to USB-A cable
Select the gamepad from the list of devices and click “Pair”
Turn off the controller by holding the playstation logo button for 10 seconds
Unplug the controller from the Raspberry Pi 5
Turn on the controller by pressing the playstation logo button
After a few seconds the controller should display solid blue lights and a white light above the PS logo.
Click “Ok” on the “Connection successful” menu.
- Option 3: Pair PS5 controller via SSH (only available on newer images)
SSH into the Raspberry Pi 5
Run the script:
sudo ~/pupperv3-monorepo/robot/utils/pair_ps5_controller.sh
Put the controller into pairing mode by pressing and holding the \|/ looking button on the top left of the gamepad and the playstation logo button at the same time until you get flashing lights
After a few seconds the controller should display solid blue lights and a white light above the PS logo.
We are working to make these steps unnecessary in the future.